1.FIRST STEPS
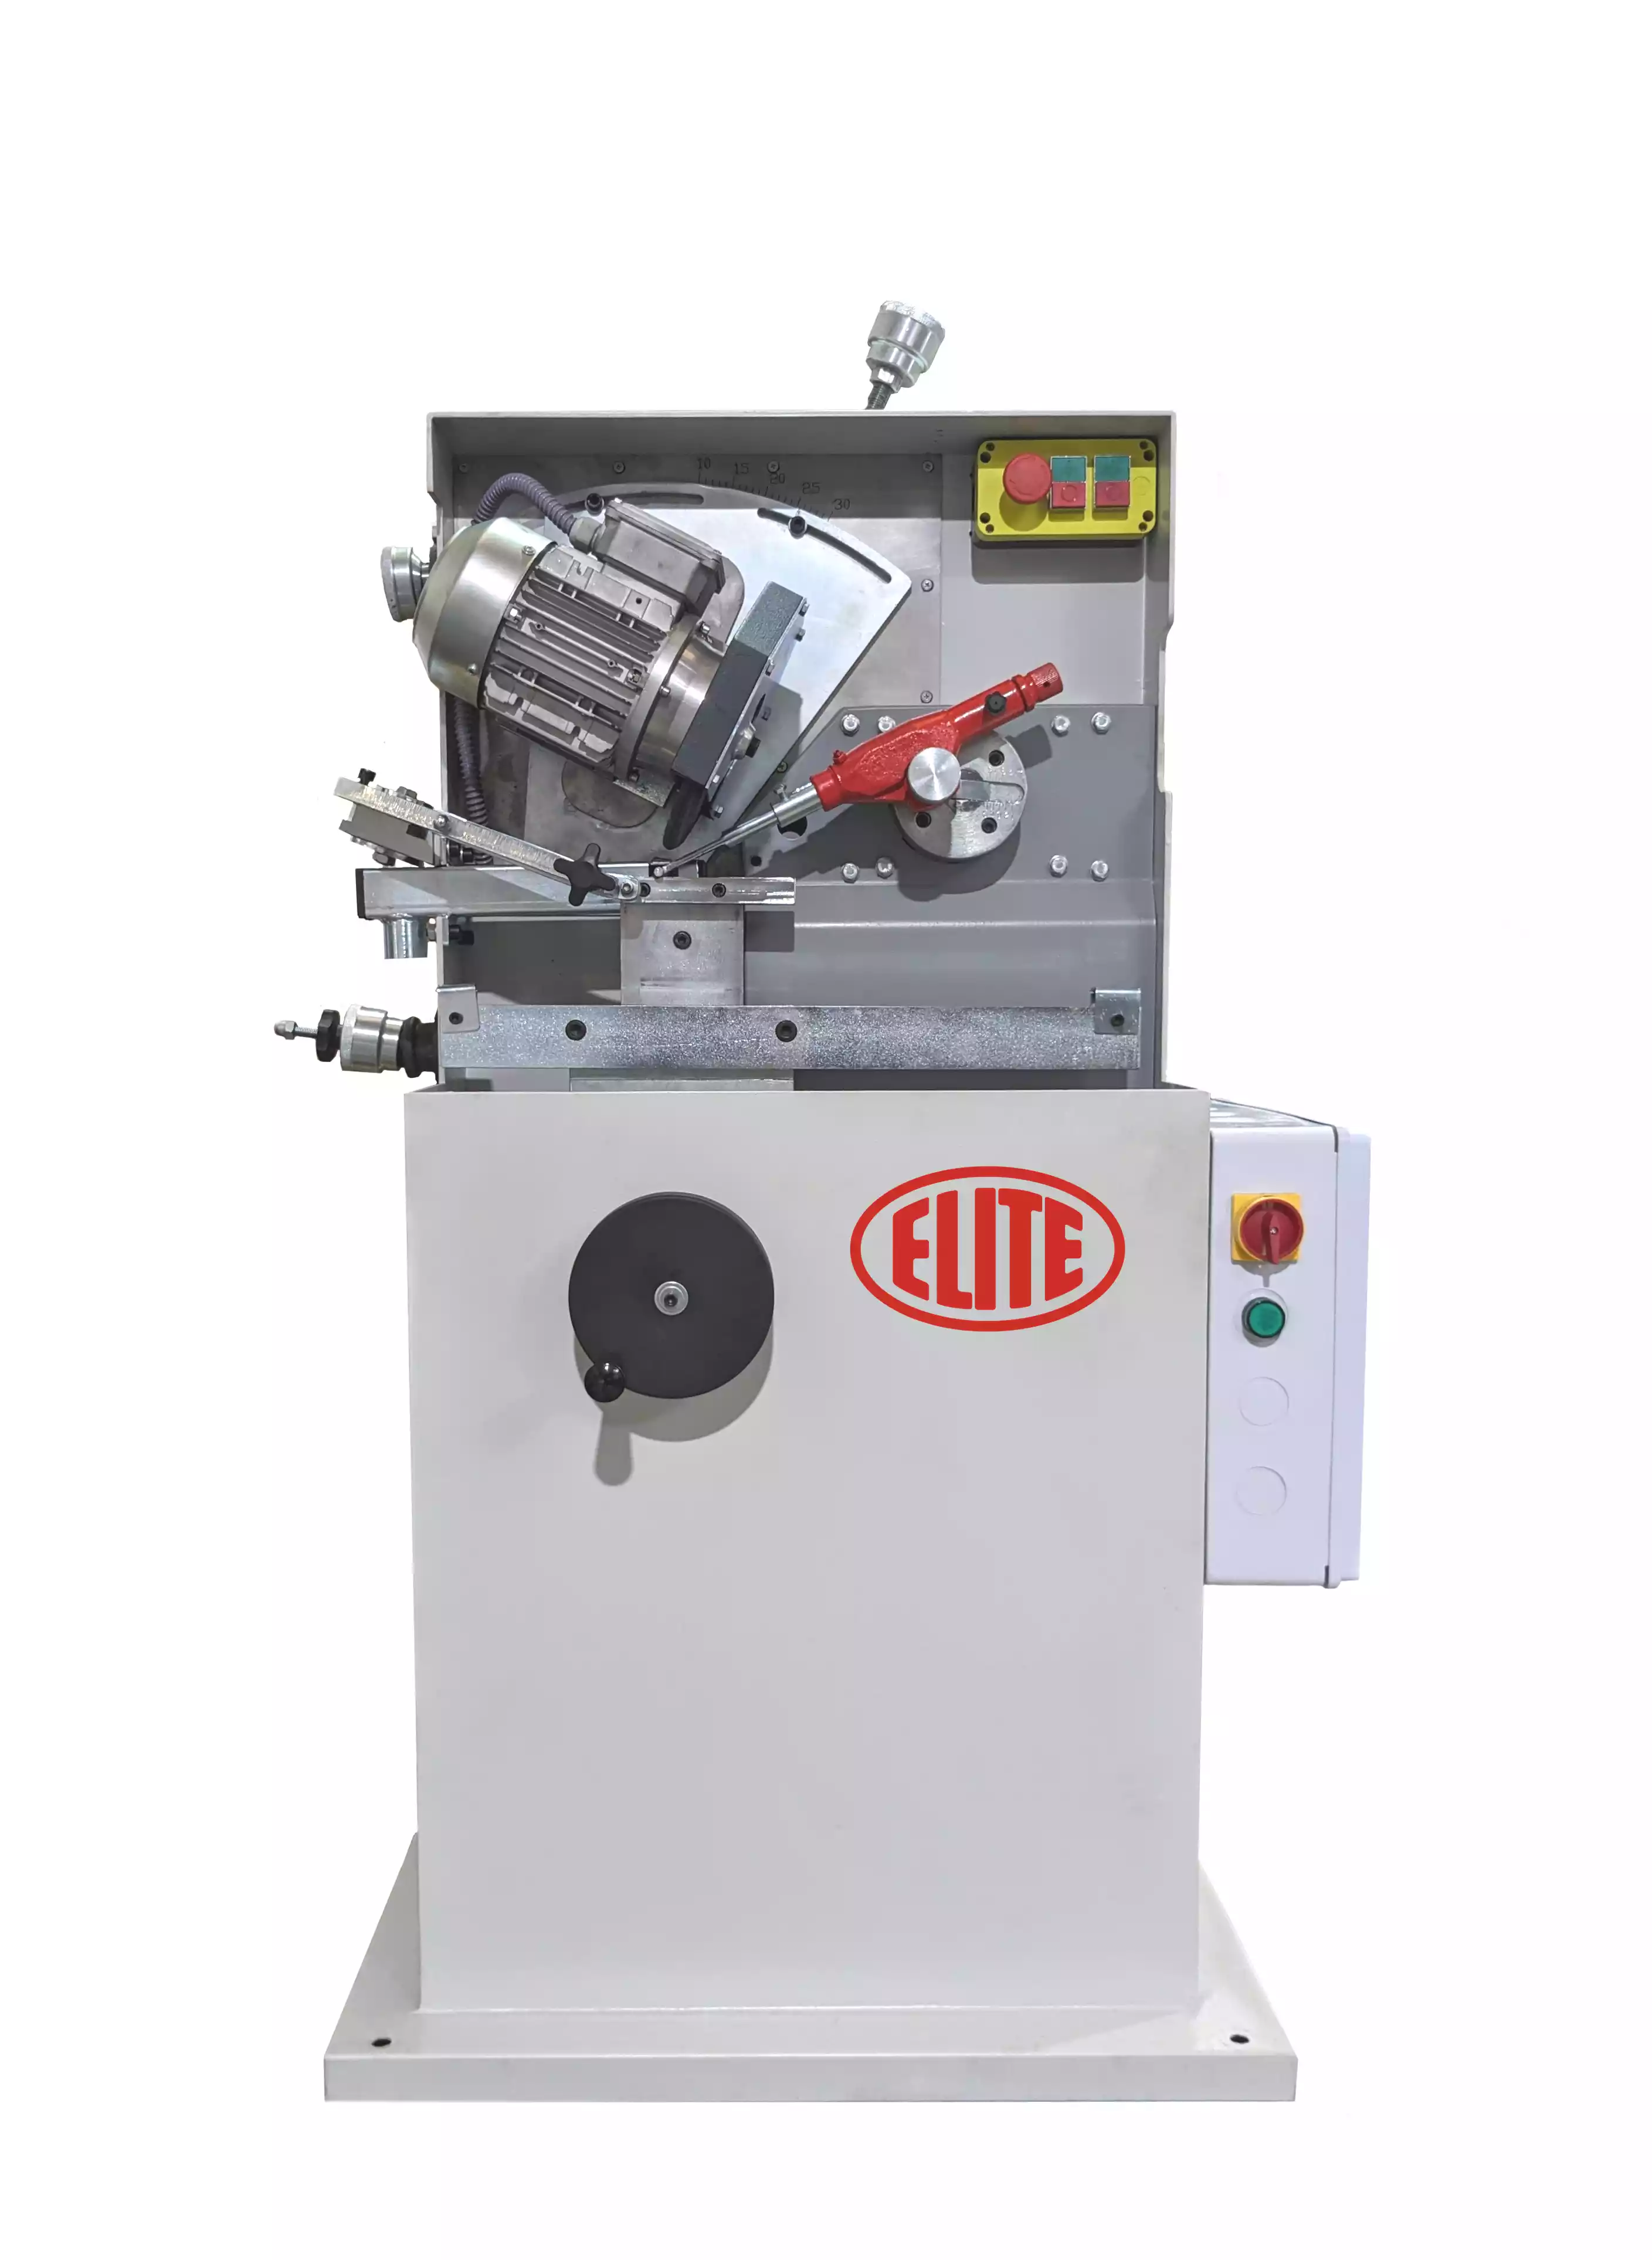
Congratulations on your purchase of the ELITE model SC 10 automatic band and circular saw sharpening machine.
Read this guide before you start.
The ELITE SC 10 is an automatic band and CV circular saw sharpener specially designed for sawmills, for sharpening band saws from 20 (3/4") to 250 mm (9.8") with different tooth shapes. Its design and simple programming allow sharpening work to be optimized in an agile and safe way.
This manual introduces you to the main functions of the sharpening in order to avoid risks to your health or that may cause a breakdown or premature wear of the machine.
In case of any doubt, please contact us or one of our authorized distributors.
Informative Note: The use described in the manual of this sharpening machine described therein may present some variations in use as our machinery is subject to possible construction modifications, depending on the incorporation of technological advances in our sharpening equipment.
2.SAFETY
2.1.Safety regulations
Carefully observe and apply the following safety rules, not respecting these rules may cause personal injury or damage to the machine itself.
The installation and maintenance of the machine described in this manual must be carried out only by operators who are familiar with its operation and have sufficient technical knowledge.
The ELITE sharpening machines of the SC 10 model range have been designed for the sharpening of band and circular saw excluding any other type of operation.

DANGER HIGH VOLTAGE

DANGER OF ACCIDENT

DANGER DUE TO SPARK PROJECTION

WEAR PROTECTIVE SHOES

DANGER FROM SHARP TOOLS

USE HEARING PROTECTORS
These warnings do not include all possible risks that improper use of the machine could cause. For this reason, the operator must proceed with prudence and observing the rules.
2.2.Use and storage of the instruction manual
This instruction manual must be read and understood by all personnel who come into contact with the machine.
This manual is for:
- Indicate the correct use of the machine according to the type of work to be carried out.
- Provide the necessary instructions for the transport, adjustment and maintenance of the machine.
- Facilitate the ordering of spare parts and information of risks.
Limits of use of the manual:
The machine is intended for professional use and therefore the experience of the operator is required and of vital importance.
Importance and conservation of the manual:
This manual must be considered part of the machine and must therefore be attached to it until the end of its use.
Additional information and clarifications:
The user, owner or maintenance person can contact the manufacturer to request any additional information on the use of the machine and possible modalities for maintenance and repair intervention.
Expiration of responsibility:
The manufacturer is considered exempt from any liability in the event of:
- Improper use of the machine
- Use of the machine by untrained persons
- Serious failures in scheduled maintenance
- Unauthorized interventions or modifications
- Use of non-original spare parts.
2.3.Declaration of conformity
The company hereby:
Elite Machines, SLU
Joan Oró, 27
ES-08635 Sant Esteve Sesrovires
Declares that the product indicated below, based on its conception and construction, as well as the version put on the market by our company, complies with the mandatory basic health and safety requirements of the CE directive.
This declaration loses its validity in the event of unauthorized modifications to the product.
Product name: Elite model SC 10
Product type: Automatic band and circular saws sharpening machine
Serial No.: __
EC Directive Competences:
- EC Machinery Directive (2006/42/EC)
- European directive on electromagnetic compatibility (2014/30/EU)
- The protection purposes of the CE low voltage directive (2006/95/CE) were fulfilled according to annex I, nr. 1.5.1 of the machinery directive 2006/42/EC
The technical documentation was compiled by legal representative of the documentation:
Sergi Valls Gramunt
Joan Oró, 27
ES-08635 Sant Esteve Sesrovires
Date / manufacturer - Signature: __
Signatory data: Sergi Valls Gramunt, manager
3.TECHNICAL DATA
In the following information table, find the list of technical specifications of the sharpening machine described in this manual.
| FEATURES | |
|---|---|
| Bandsaw Width | from 20 to 250 mm. (3/4" to 9.8") |
| Band saw thickness | Up to 6mm. (0.23") |
| Tooth pitch | From 0 to 55mm. (0" to 2-1/4") |
| Sharpening speed | 29 teeth/minute |
| Tooth profiles | Triangular, spaced triangular, curved |
| Angle | From 3º to 30º |
| Grinding wheel dimension | 200 x 13 x 20mm. |
| Grinding wheel motor | 0.75 kilowatts |
| Engine power | 0.55 kilowatts |
| Connection | 220 V. 60 HZ. 3 phases |
| Machine dimensions | 1100 x 750 x 1400mm. |
| Machine weight | 148kg |
4.TRANSPORT
The ELITE SC 10 is delivered packed in a wooden crate.
During all transport and transfer, the machine must be kept in its original vertical position, any variation in this position may lead to the loss of the guarantee.

| Machine model | Dimensions packed with easel set (mm) | Gross weight with easel set (kg) |
|---|---|---|
| SC 10 | 2670x1070x1580 | 420 |
4.1.Unpacking and assembly instructions
Be especially careful when lifting the load: The load may not be centered!
To lift or move the load, use a forklift with blades long enough to support the machine, taking into account the width and depth of the machine when calculating the weights to be lifted.
Once the packaging is opened, if the machine is delivered with horses, carefully remove the fixings on the feet of the horses and the fastenings that prevent them from moving during transport
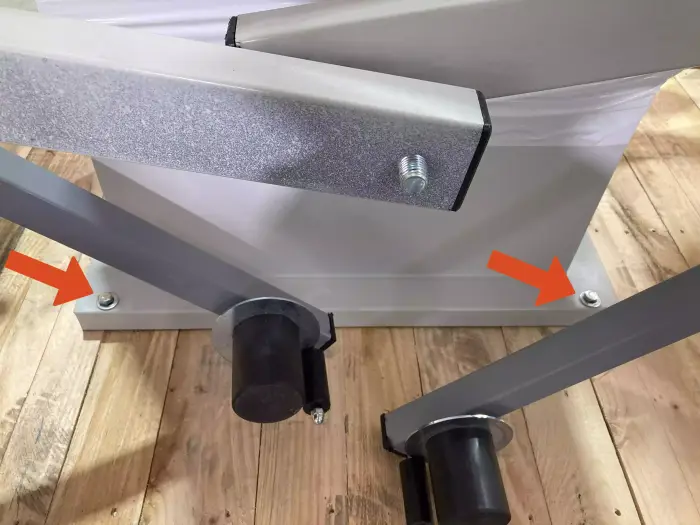
Then remove the fixing stops from the feet of the machine
Once the machine is in its final location, you can also remove the protective film and other protections from the components, which secure and prevent the machine from moving.
5.INSTALLATION
5.1.Machine placement
Before any work make sure that the machine is well aligned and does not oscillate at any of its ends, in which case it must be wedged to avoid movements. For its correct level it is necessary to use a leveling tool. This check must be carried out both longitudinally and transversally.

Poorly leveling the machine can cause unwanted vibrations and premature wear of the linear guides.
WARNING: The machine must not be used under any circumstances by unqualified or unauthorized personnel.
5.2.Electrical connection
DANGER HIGH VOLTAGE!
The electrical connection of the machine must be carried out by qualified technical personnel only at the voltage indicated in the machine order / machine identification plate.
For any doubt about the voltage, consult the manufacturer before the connection.
Any claim for an incorrect connection will be out of warranty.
Remember: Before connecting the machine, remove any guards the machine may have to protect the components during transport.
5.3.Main components of the machine
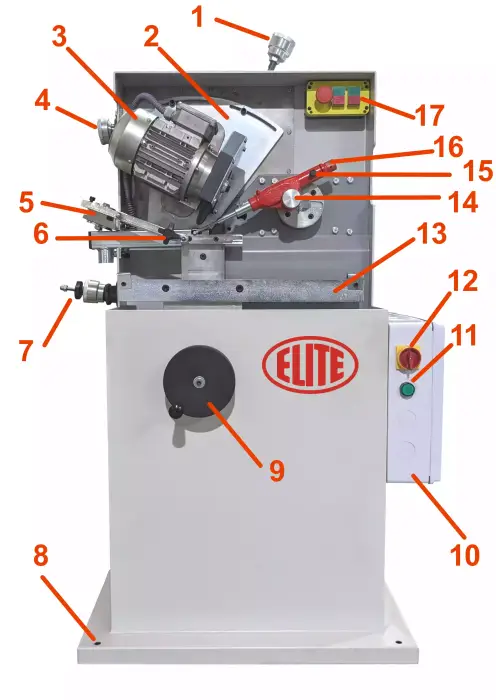
- Handwheel for adjusting the height of the grinding wheel
- Plate for displaying the degrees of inclination of the grinding wheel
- Grinding wheel motor
- Handwheel for adjusting the degrees of inclination of the grinding wheel
- Clamp for fixing the band saw
- Pressure spring to apply the fixing pressure to the band saw blade
- Handwheel for adjusting the sharpening depth of the band saw tooth profile
- Holes for anchoring the machine to the ground
- Handwheel for adjusting the height of the band saw
- Electrical panel
- Mains voltage indicator light
- General machine power switch
- Bandsaw support bar
- Feeding pawl
- Feeding pawl depth lock
- Feeding pawl depth selector
- On and off buttons for the grinding wheel motor and tooth advance.
5.4.Control panel
![]()
- Emergency stop button
- Grinding wheel ON/OFF
- Feeding pawl ON/OFF
6.STARTING UP
In this section we show you to operate the SC 10 in order to work.
NOTE: The data that appears in the different images are by way of example, each type of tool has its recommended data and a skilled operator must know them.
Emergency stop
It's the round red button. In the event that there is a failure in use or a dangerous situation is being created, it allows the immediately disconnection of the machine.
Should not be used unless strictly necessary.
Once used, to use the machine again, you must pull it to return to the initial position, additional referencing and setting up must be needed.
WARNING: Under no circumstances should this control be modified or manipulated, this automatically puts the operator and people around him in danger of serious injury.
Sharpening operation
To start the sharpening process, you must first make sure that the emergency stop button is not activated.
DANGER: never manipulate the buttons on the control panel while changing the abrasive wheel: danger of very serious injuries. It is highly recommended to switch off and disconnect from power mains the machine when working inside the machine.
WARNING: before start to rotate the grinding wheel make sure that it is well attached to the wheel holder where it is located and that NOBODY is manipulating in the area where it rotates. UNDER NO CIRCUMSTANCES SHOULD THE WHEEL BE STARTED WHILE SOMEONE IS HANDLING IT.
ELITE SC 10 Set up

6.1. Turning on the machine
The ELITE SC 10 sharpener has been designed for sharpening band saws with the maximum dimensions described above in the technical characteristics.
The machine is built from welded and cast parts.
6.1.1.Power on
After switching on, a central green lamp on the control panel lights up. This lamp indicates that the pusher motor or grinding wheel motor can be activated.
On the control panel there are two DM safety buttons that activate one or the other motor (indicated by the upper or lower light). The three lights correspond to the three phases.
Make sure the motor rotates in the correct direction. If it rotates in the opposite direction, two of the electrical phases in the network connection cable must be exchanged.
![]()
6.1.2.Electrical connection
ELITE SC 10 sharpeners must be connected strictly to the voltage indicated in the machine order and on the machine itself. Connection to a voltage different from that indicated may cause a breakdown of the machine and represents a risk to people using the machine.
This installation must be carried out by qualified technical personnel and checked with a voltage meter before turning on the machine.
It is absolutely essential that the section of the connection cable is the required one, that the machine has a dedicated outlet protected against overloads and bypasses, and that it is as close as possible to the power outlet.
We reject any responsibility for a poorly made connection.
Once the connection has been made and checked, turn the main ON/OFF switch to the ON position.
Before putting it into operation, check that the emergency stop is deactivated.
Elite rejects all responsibility for a wrong connection, which in addition to causing the machine to malfunction can harm people, animals, and material objects.
7.WORK OPERATION
7.1.Preparation for the sharpening process
To start the sharpening operation, loosen screw #7 by turning it counterclockwise. Place it on the right side so that the hand bar is horizontal.
Next, fix the No. 8 screw so that the hand bar remains horizontal. Open the saw jaw with hand bar No.1. Raise the guide wheel 20mm.
Next, place the saw, resting it on the guides (13). Make sure the rest of the saw is placed on the supports between the rollers, and also on the rear support (attached to the sharpener). The saw should rest on the guides and the first two rollers should be 5-10 mm lower. When the saw is in the desired position, return the saw jaw and hand bar to their original position.
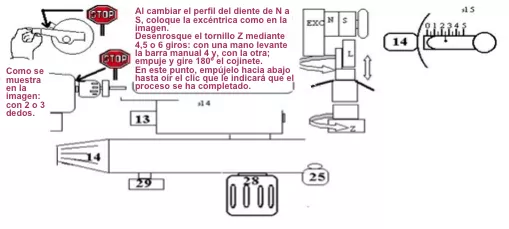
7.2.Steps for setting up the sharpener
Loosen the No.28 screw in a semicircle (for right side sharpeners; on the left side, for left side sharpeners; on the right side). Set the pusher to the left and then adjust the desired pitch with the No. 13 screw. Then retighten the No. 28 screw. Before turning on the push motor, raise the No. 4 hand bar so that the saw tooth do not hit the grinding wheel (sharpening stone). Use the No.14 screw to adjust the face of the tooth (the front part).
To achieve greater sharpness, turn the screw clockwise; To decrease sharpening, turn the screw counterclockwise.
Once the wheel reaches the face of the tooth (front), sharpening can begin.
THE OPERATOR SHOULD PAY SPECIAL ATTENTION WHEN HANDLING THE MANUAL BAR Nº 14, TO AVOID TRAPPING THEIR FINGERS IN SCREW Nº 13.
![]()
WARNING: The machine must not be used under any circumstances by unqualified or unauthorized personnel.
7.3.Settings for band saws and circular saws
7.3.1.Grinder settings
![]()
7.3.2.Adjustment of the height eccentric
![]()
7.4.Sharpening problems and their solutions
![]()
8.MAINTENANCE
8.1.Preventive maintenance
Maintenance of the ELITE model SC 10 sharpeners is very simple but at the same time important.
The lifespan of a single machine largely depends on its lubrication, so these instructions must be strictly followed. Lubricants from open containers cannot be used, because a small particle or chip is enough to destroy the bearings.
Clean with benzol. Gasoline and petroleum are not recommended. Lubricating medium, clean the gearbox casing only with non-fibrous cloths. Do not use compressed air.
If the machine is not used for several days, clean and oil the polished parts to prevent rust.
Keeping the machine clean and in good condition will allow for optimal long-term use.
Use the equipment only in dry environments. The temperature must be between 5 and 40ºC. A relative humidity greater than 90%, as well as a saline environment, would cause premature corrosion of the machine.
9.ACCESSORIES AND CONSUMABLES
9.1.Grinding wheels
For top grinding use the grinding wheel ref. nr. 5410-A. S ø200x10xø20 mm.
9.2.Coolant agents
We recommend to use ELITE SintoCut MIX or equivalent.
10.WARRANTY
All our machines are tested before being shipped. However, there can always be defects that are not observable at first sight.
Our machines are guaranteed against manufacturing or material defects under normal use and maintenance conditions.
The period of this guarantee is 12 months from the date of purchase and consists of the replacement of defective material.
The guarantee will be automatically canceled in the event of a modification outside our company. Or in manifest cases of misuse of the machine.
The guarantee does not include parts subject to normal wear due to use such as skids, lubrication cartridge, abrasives, etc.
11.DOWNLOAD MANUAL
12.FAQ
Question nr1
Answer no. 1