1. FIRST STEPS
Congratulations on your purchase of the ELITE model LM PRO tensioner.
Please read this guide before you begin.
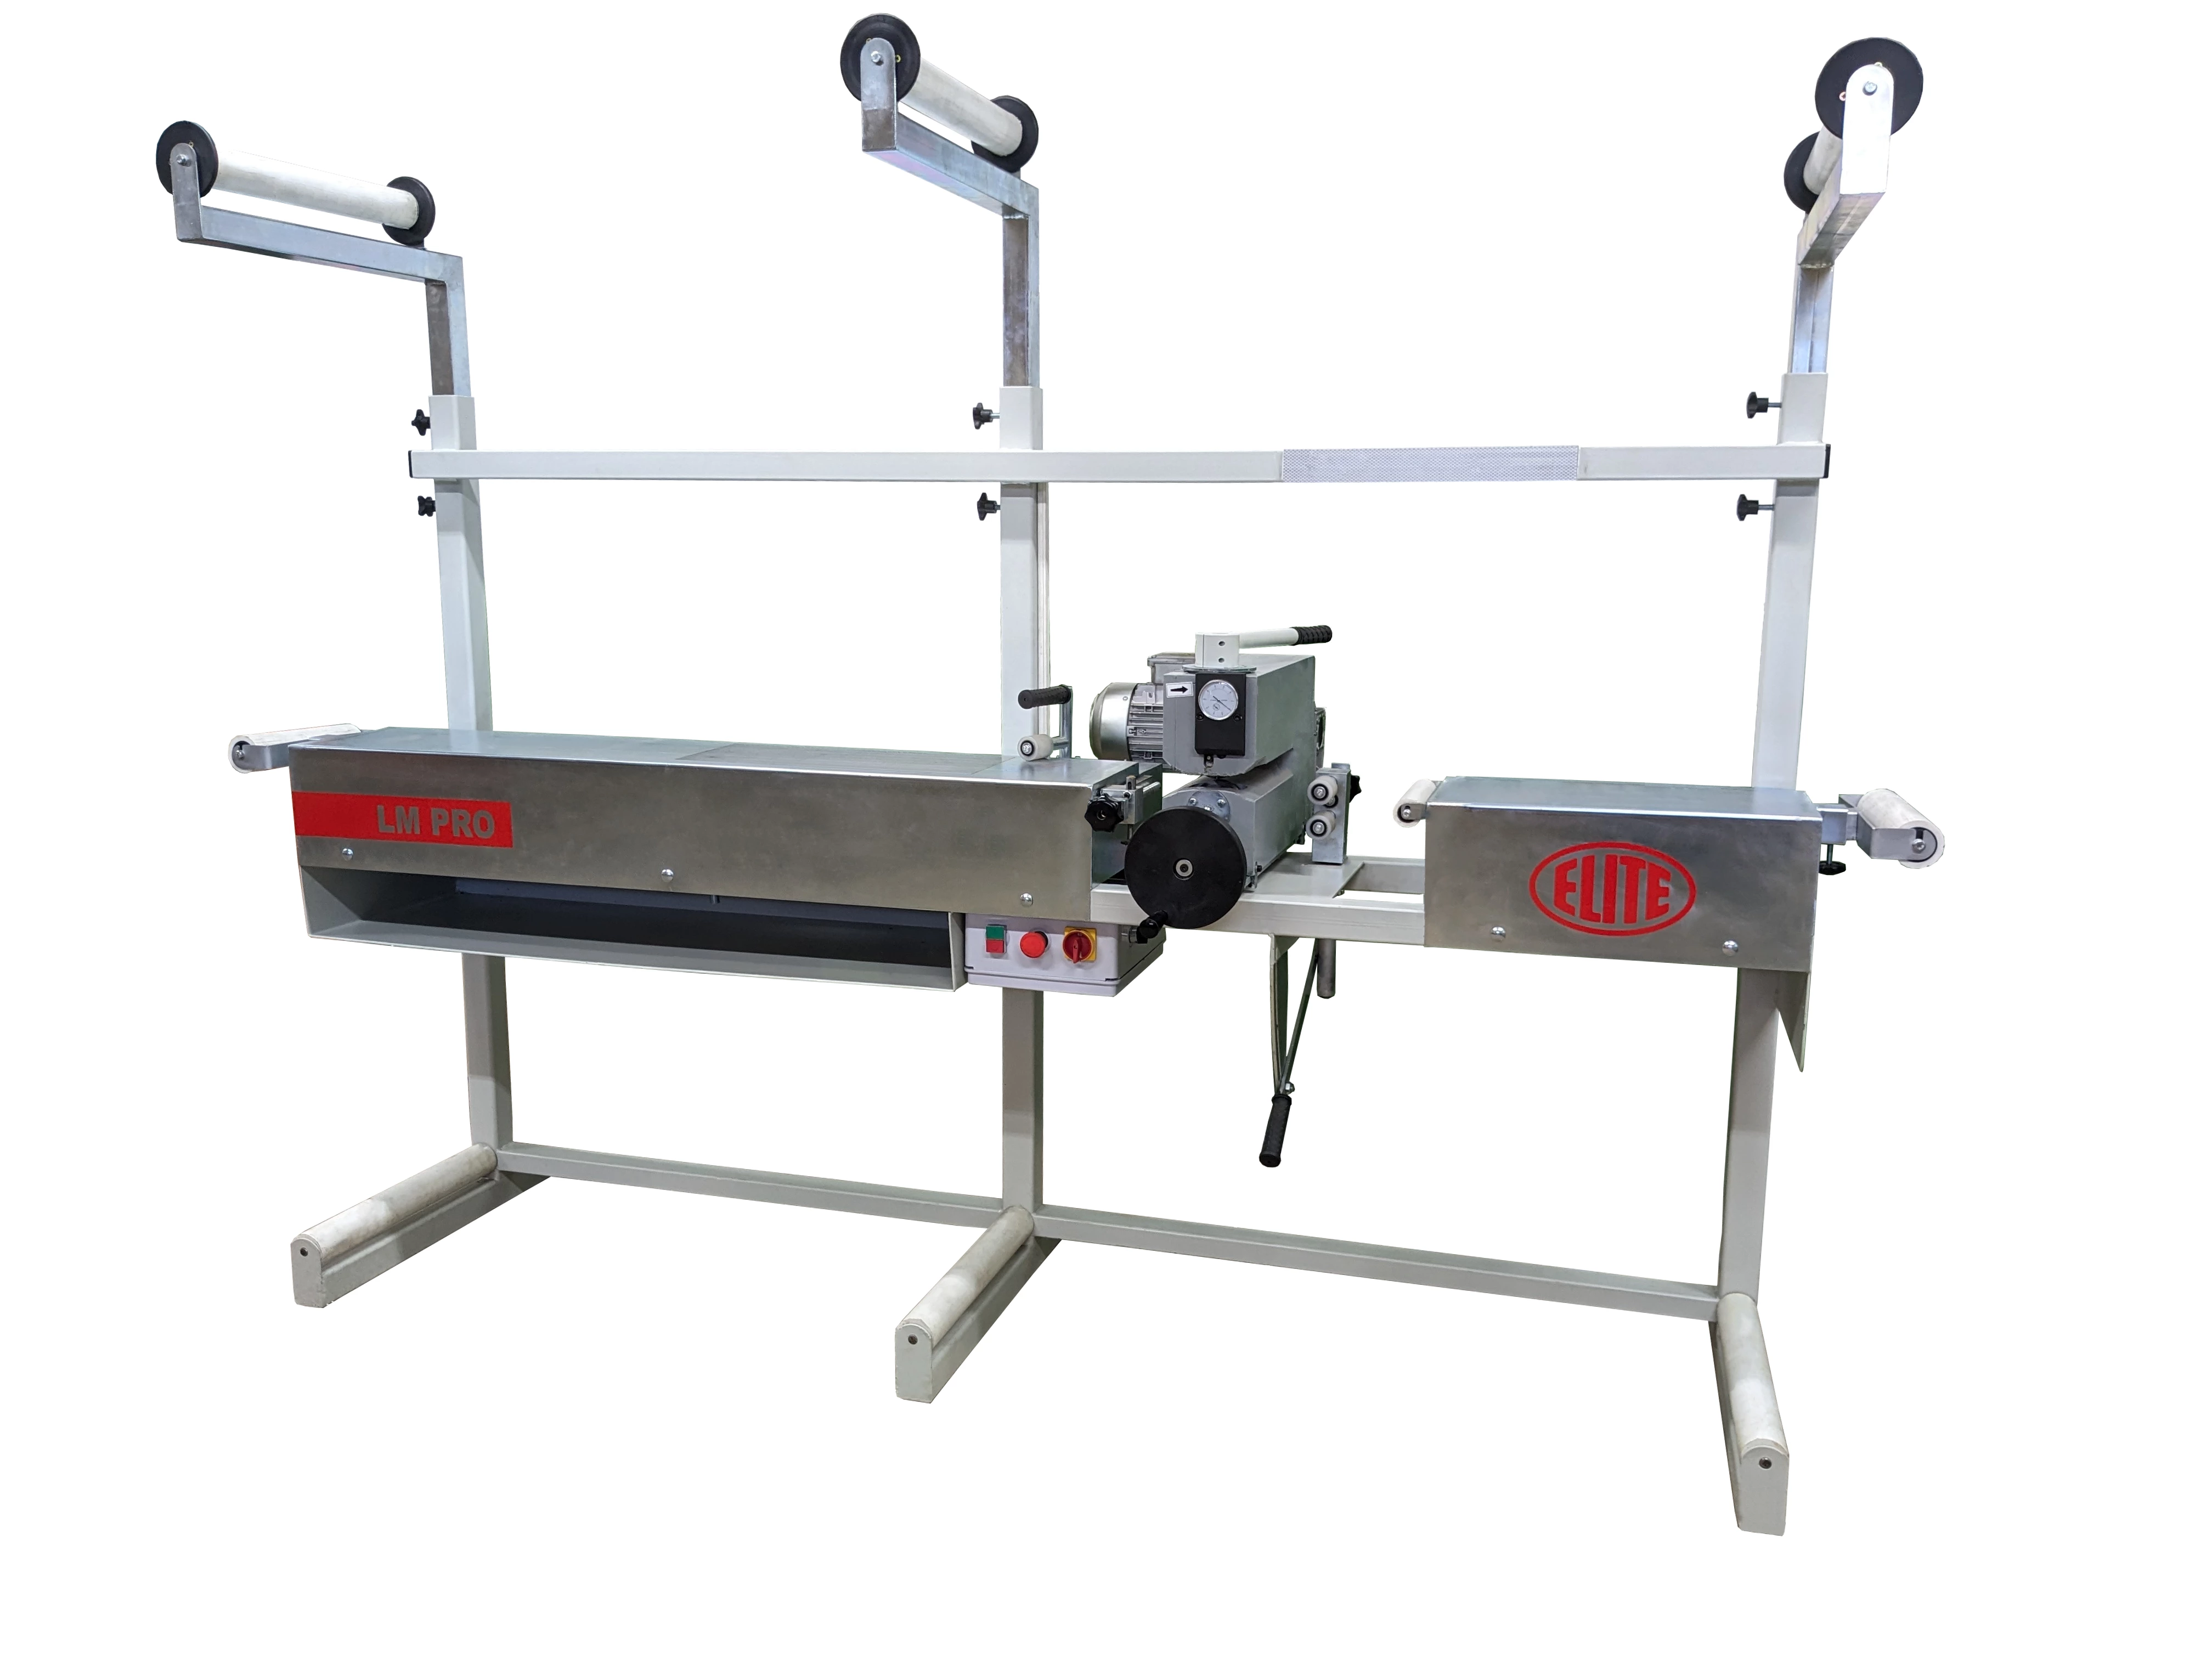
The LM PRO is a roller tensioner specially designed for sawmills. Its design and simple adjustment allow you to optimize work in an agile and safe way.
You can view the product catalog at the following link: ELITE model LM PRO
This manual presents the main functions of the tensioner in order to avoid risks to your health or that could cause a breakdown or premature wear of the machine.
If in doubt, contact us or one of our authorized distributors.
Informative Note: The use described in the manual of this tensioning machine described therein may present some variations in use since our machinery is subject to possible construction modifications, depending on the incorporation of technological advances in our equipment.
2. SECURITY
2.1.Safety regulations
Carefully observe and apply the following safety rules, failure to comply with these rules may cause personal injury or damage to the machine itself.
The installation and maintenance of the machine described in this manual must be carried out only by operators who are familiar with its operation and have sufficient technical knowledge.
The ELITE LM PRO tensioner has been designed for tensioning band saws, excluding any other type of operation.
DANGER HIGH VOLTAGE

DANGER OF ACCIDENT

DANGER DUE TO SPARK PROJECTION

WEAR PROTECTIVE SHOES

DANGER FROM SHARP TOOLS

USE HEARING PROTECTORS
These warnings do not include all possible risks that improper use of the machine could cause. For this reason, the operator must proceed with prudence and observing the rules.
2.2.Use and storage of the instruction manual
This instruction manual must be read and understood by all personnel who come into contact with the machine.
This manual is for:
- Indicate the correct use of the machine according to the type of work to be carried out.
- Provide the necessary instructions for the transport, adjustment and maintenance of the machine.
- Facilitate the ordering of spare parts and information of risks.
Limits of use of the manual:
The machine is intended for professional use and therefore the experience of the operator is required and of vital importance.
Importance and conservation of the manual:
This manual must be considered part of the machine and must therefore be attached to it until the end of its use.
Additional information and clarifications:
The user, owner or maintenance person can contact the manufacturer to request any additional information on the use of the machine and possible modalities for maintenance and repair intervention.
Expiration of responsibility:
The manufacturer is considered exempt from any liability in the event of:
- Improper use of the machine
- Use of the machine by untrained persons
- Serious failures in scheduled maintenance
- Unauthorized interventions or modifications
- Use of non-original spare parts.
2.3.Declaration of conformity
The company hereby:
Elite Machines, SLU
Joan Oró, 27
ES-08635 Sant Esteve Sesrovires
Declares that the product indicated below, based on its conception and construction, as well as the version put on the market by our company, complies with the mandatory basic health and safety requirements of the CE directive.
This declaration loses its validity in the event of unauthorized modifications to the product.
Product name: Elite model LM PRO
Product type: Tensioner for tensioning and tempering band saws
Serial No.: __
EC Directive Competences:
- EC Machinery Directive (2006/42/EC)
- European directive on electromagnetic compatibility (2014/30/EU)
- The protection purposes of the CE low voltage directive (2006/95/CE) were fulfilled according to annex I, nr. 1.5.1 of the machinery directive 2006/42/EC
The technical documentation was compiled by legal representative of the documentation:
Sergi Valls Gramunt
Joan Oró, 27
ES-08635 Sant Esteve Sesrovires
Date / manufacturer - Signature: __
Signatory data: Sergi Valls Gramunt, manager
3.TECHNICAL DATA
In the following information table, find the list of technical specifications of the sharpening machine described in this manual.
| TECHNICAL DATA | ELITE LM PRO |
|---|---|
| Bandsaw Width | Up to 250mm. (up to 9.8") |
| Belt rotation speed | 7050 mm./min. |
| Band saw feed speed | Up to 7 m/min |
| Engine power | 0.75 kW |
| Connection | 230-400 V. / 50 Hz / 3 Ph. |
4.TRANSPORT
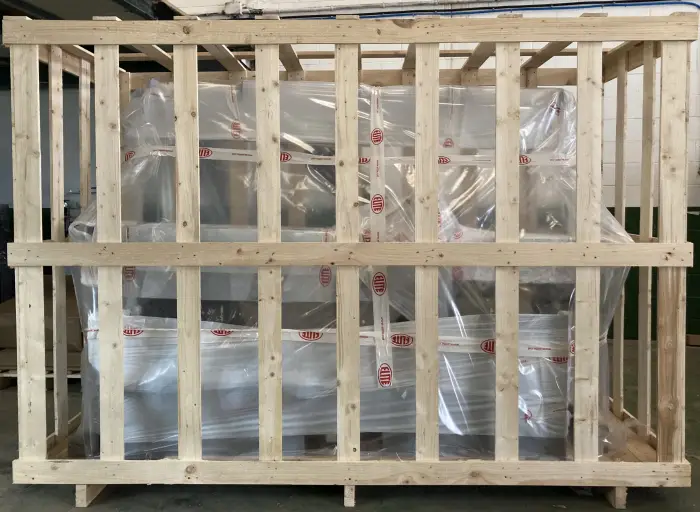
The ELITE LM PRO is delivered packed in a cage or wooden box, depending on its destination and means of transport.
During all transportation and transfer, the machine must be kept in its original vertical position; any variation in this position may result in the loss of the warranty.
| AVAILABLE VERSIONS | ||
|---|---|---|
| Model | Packaging size | Gross weight |
| LM PRO without workbench | 400 x 510 x 400mm. | 90 kilos |
| LM PRO with workbench | 2870 x 1080 x 2080 mm. | 500 kilos |
4.1.Unpacking and assembly instructions
Take special care when lifting the load: The load cannot be centered!
To lift or move the load, use a forklift with blades long enough to support the machine, taking into account the width and depth of the machine when calculating the weights to be lifted.
Once the packaging is opened, remove the fixing stops from the feet of the machine
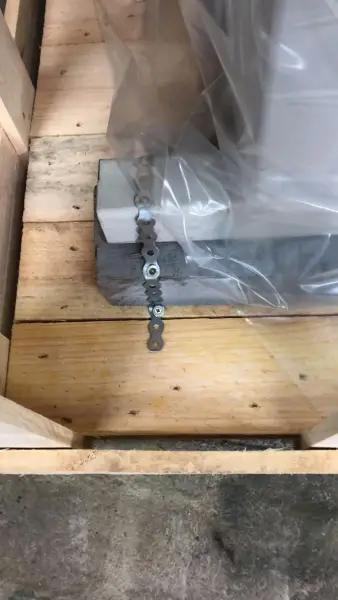
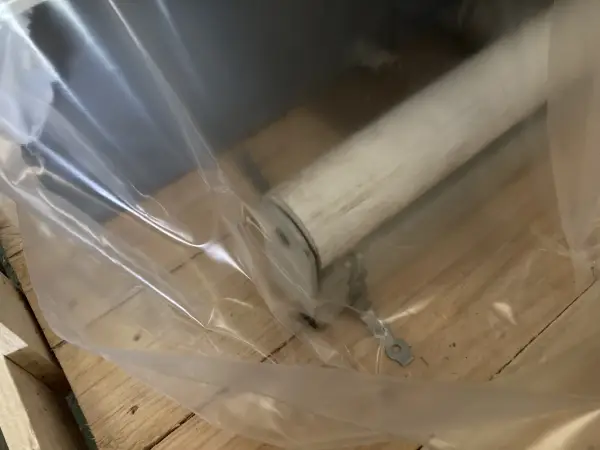
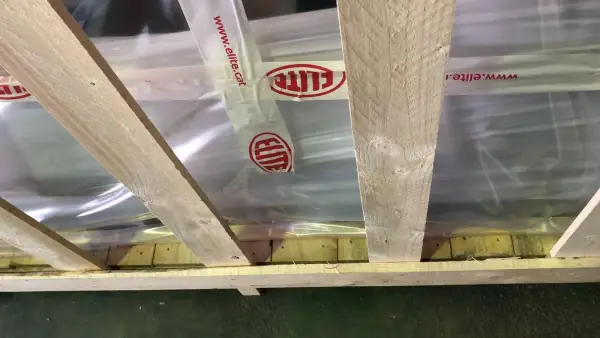
Once the machine is in its final location, you can also remove the protective film and other protections from the components, which secure and prevent the machine from moving.
5. INSTALLATION
5.1.Placement of the machine
The LM PRO roller tensioner must be installed on a specific work table for this purpose. The workbench designed for this purpose is optionally available.
To do this, fix the tensioner using the two M8 rollers (located at the front and rear).
Place the tensioner on its respective table, being careful not to damage the most delicate parts of it.
ATTENTION: The machine must not be used under any circumstances by unqualified or unauthorized personnel.
5.2.Electrical connection
DANGER HIGH VOLTAGE!
The electrical connection of the machine must be carried out by qualified technical personnel only at the voltage indicated in the machine order / machine identification plate.
For any doubt about the voltage, consult the manufacturer before the connection.
Any claim for an incorrect connection will be out of warranty.
The ELITE LM PRO roller tensioner must be connected strictly to the voltage indicated in the machine order and on the machine itself (machine identification plate). Connection to a voltage different from that indicated may cause a breakdown of the machine and represents a risk to people using the machine.
This installation must be carried out by qualified technical personnel and checked with a voltage meter before turning on the machine.
It is absolutely essential that the section of the connection cable is the required one, that the machine has a dedicated outlet protected against overloads and bypasses, and that it is as close as possible to the power outlet.
Any claim for incorrect connection will be out of warranty.
Once the connection has been made and checked, turn the main ON/OFF switch to the ON position.

Before putting it into operation, check that the emergency stop is deactivated.
Remember: Before connecting the machine, remove any guards the machine may have to protect components during transport.
Elite Sharpening Machines, rejects all responsibility for a wrong connection, which in addition to causing a malfunction of the machine can harm people, animals, and material objects.
5.3.Main components of the machine
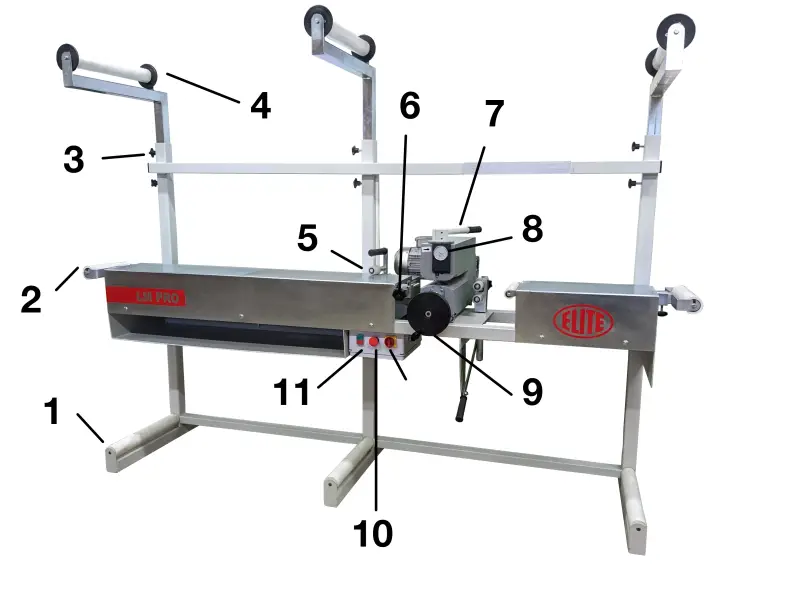
- Band saw lower guide rollers
- Side guide rollers
- Positioning and fixing bolts of the upper guide rollers
- Upper guide rollers
- Fixing roller of the band saw on the machine table
- Band saw width adjustment knob
- Tension roller pressure selection lever
- Tension roller position indicator
- Tensioning roller positioning handwheel
- Emergency stop
- Start/stop button
6. START-UP
In this section we show you how to operate the ELITE LM PRO to get it working.
NOTE: The data that appears in the different images is an example, each type of tool has its recommended data and an expert operator should know them.
In the lower-central part you will find a control panel, made up of the following components:
- Main ignition switch
- Emergency stop
- Machine on/off button
6.1. Starting the LM PRO tensioner
During installation, we strongly recommend that a duly approved electrician connect the machine to the electrical network, and that all high voltage protection and control measures be taken into account.
After turning on the main switch, adjust the motor direction (the lower roller should rotate to the right). To change direction, change two phases in the motor or fork.
After that, check the oil level by unscrewing screw #1. In this one, you will notice two lines on the oil gauge showing the upper and lower oil levels (we recommend using SAE-90 oil).
After placing the saw between both rollers, adjust the position of bar #2. There are two screws in it (see fig. 3), after loosening them using wrench 6, place bar 4 as in image 2 and fix screw 3.
7. WORK OPERATION
The tensioning table (or tensioning bench) must be made of hard wood or steel plates, in addition to being perfectly smooth. The work table should be 2.5 mm longer and 100 mm wider than the widest band saw to be used. A screed 1.5-2 m long is also required.
Once these requirements have been considered, proceed as follows: align a roller clamping device and an anvil to the table. There are convex and flat anvils. If convex, the anvil should be 200 mm wide (up to 450 mm for wide saws) and around 300 mm long and up to 350 mm high. The anvil should be fixed on a firm surface. The work surface should be slightly convex with a curved radius of around 6m (so it would be 2mm higher at the midpoint than at the edges). It is also possible to use a horizontal anvil, which is also easier to install.
The rollers should be placed below and above the upper roller table. The upper roller, anvil and lower roller must be centered vertically.
The alignment plate, anvil and top of the lower roller must be perfectly level horizontally. Carrier rollers should be made of hardwood or rubber-coated steel. Sufficient lighting is required for accurate adjustment and leveling.
!! ATTENTION: The machine must under no circumstances be used by unqualified or unauthorized personnel.
7.1. Preparation for tensioning
7.1.1. Verification of saw plates
After cutting the teeth, the saw plate curves slightly. Eliminate the resulting curve by cutting the tooth on the shorter side.
The cutting edge of the saw plate should be slightly shorter than the trailing edge (to compensate for stretching caused by heat during cutting).
The average curvature should be 0.4 mm for a length of 1.5 mm or 0.7 mm.
7.1.2. Standard measuring ruler
This must be 2m and 1.6mm for every 3m. If the serrated edge is too short, there is a risk of breaking the base of the teeth.
You can achieve a slight curvature by rolling lightly along the plate, between the middle and back of the saw plate.
7.1.3. Stressed
Tensioning is that procedure in which the working conditions that the saw will endure are simulated.
Saw plates with a width greater than 60 mm must be tensioned (if possible before welding).
By rolling the middle part of the saw plate, it will be longer than the edges and the edges will become more rigid.
7.2 Correct results of the tensioning process
When the tensioned saw plate is in a cutting machine, the surface of the saw touching the sharpening wheels will make a curve (also known as a crown) and the saw will rest mostly on its edges.
This fact implies the following:
- The saw will be rigid and will remain in the same condition during work.
- The stability of the saw will be maintained even after heating.
- The saw plate will absorb the speed pressure.
Correct adjustment and positioning of the saw
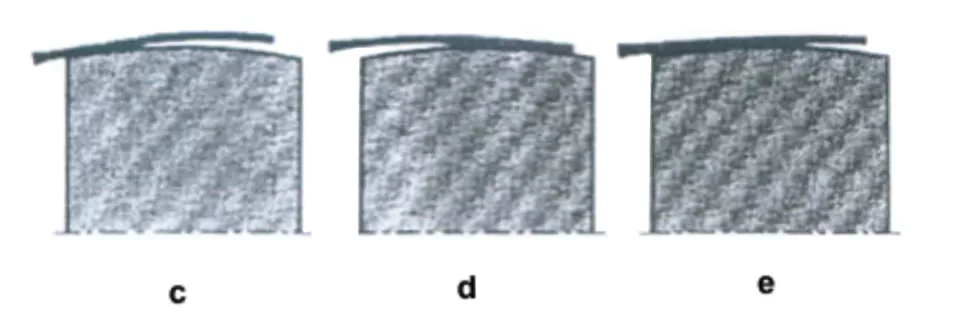
A) Wide saw plates
B) Saw plates up to 150mm.
Correct tensioning results:
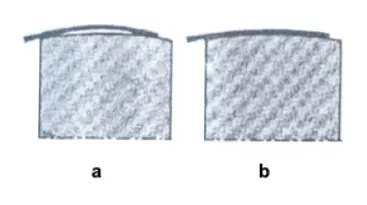
Incorrect saw adjustment and positioning
C) The saw plate touches the sharpening wheel only on the cutting edge, which leads to excess pressure.
D) The saw plate touches the sharpening wheel only with the rear edge. The cutting edge is loose and does not cut correctly.
E) The saw plate touches the sharpening wheel only with the center. This produces a vibration and breaks the saw.
Incorrect tensioning results:
7.3. Tensioning procedure
There is an established procedure for the tensioning process:
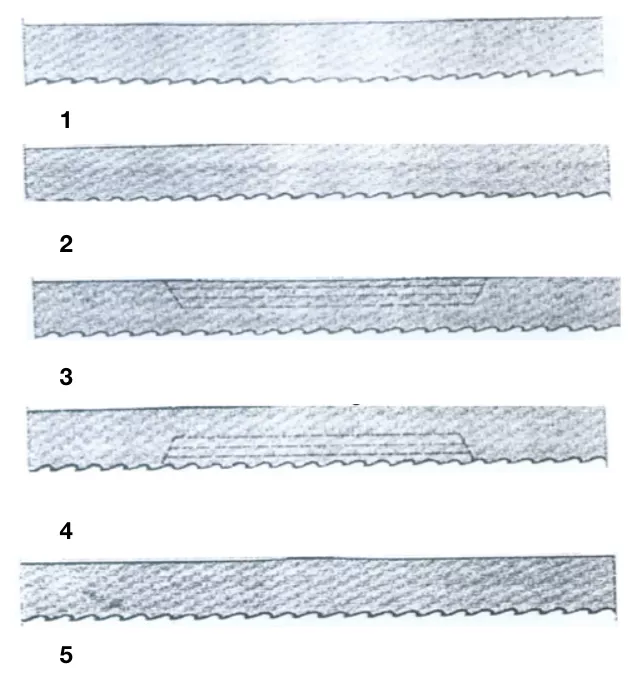
Start in the middle of the saw plate, and move the rollers to the left side and the right side, one after the other, reducing the pressure and checking the saw plate at all times.
The space between the roller lines will depend on the width of the saw and should range between 10 and 20 mm. between lines
Once the tensioning has been carried out on one side, turn the saw over and repeat this same operation on the other side. This time the lines of the rollers should be between the previous lines.
If in the middle:
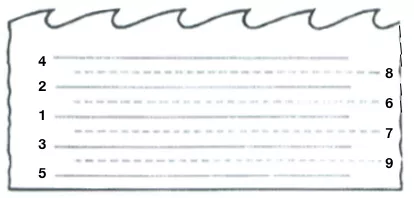
The rows of lines on the front face of the saw correspond to those of the numbers 1-2-3-4-5. While the rows on the back face correspond to the numbers 6-7-8-9.
The total number of lines depends on the tensioning needs and the width of the saw plate.
Of course, the operator can tension on only one side of the saw. However, we strongly recommend that tensioning be performed on both sides of the saw. This will allow you to use the saw on any machine.
The degree of tension of the saw plate is evaluated by lifting it (as in the illustrated image) and checking its fall. You can use a curved ruler with a specific curve diameter. If tightened correctly, a saw plate should not fall at all, or very little at first.
It is common to repeat the rolling process several times until the result desired by the operator is obtained.
7.4. Technical parameters
Tensioning parameters for band saws
NOTE: The data in the table have been obtained empirically, using band saws with a certain chemical composition. Values may vary depending on the type of material that makes up the sheets.
The tensioning is carried out by carefully repeating a balanced roll, until a perfect curvature is achieved, without bumps or defects.
Checking that the saw plate is flat:
During the procedure, check if the light seen under a planer is evenly distributed across the entire length of the saw plate. For curved rollers and high speeds, the back of the saw plate should be slightly longer. However, do not apply this until the laminate is finished. Bearing lines should be no closer than 20-30 mm from the edges.
If the saw is over-tensioned, it tends to break.
7.4.1. Re-tensioned
You should keep in mind that the width of the saw is reduced after each sharpening.
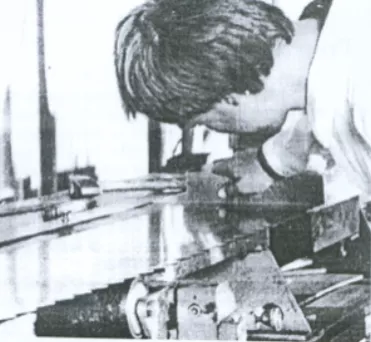
Check tensioning with a flattener

When checking with the flattener, hold the saw plate with your left hand so that it curves slightly, and gently press the flattener on the saw plate with your right hand. A narrow gap should appear between the planer and the saw.
The planer should be pressed down at a 90° angle to the saw. A uniform and symmetrical light should appear on both sides. If the tension is correct, when you press the flattener firmly on the saw, no light should appear.
7.4.2. Graduated tensioning
Although the saw plate can be overtightened, this is not recommended because excessive stretching of the steel could cause the saw to break.
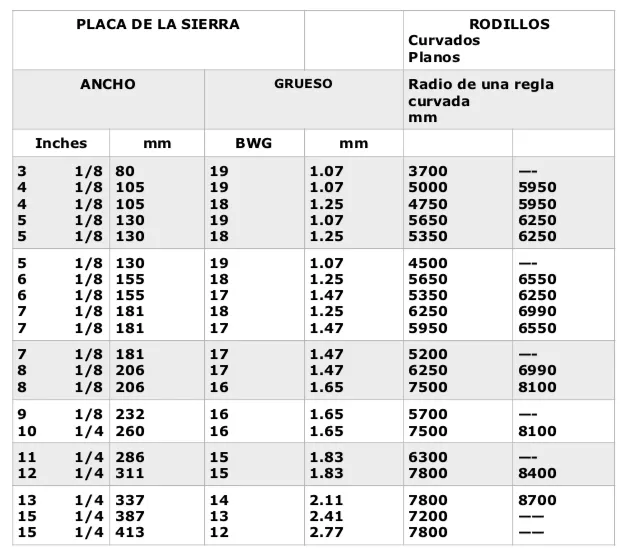
For best results it is recommended to apply the graduated adjustment. Start with 75% of the total tension. Estimating the appropriate degree of tension is a matter of experience. A hard wood will require greater tension than a soft wood. Thin saw plates will need to be tightened more than thick ones. Curved rollers will need to be tightened more tightly than flat ones. The table of technical parameters described above shows the size and radius of curvature for standard flatteners used for wide band saws / the numerical index must be indicated on the flattener.
7.5. Flattening and smoothing
Even if the saw has been perfectly flattened before tensioning, it must be flattened again.
Check the irregularity of the saw by moving a saw along a planer. The tightening line should be 20-30mm from the edge.
- Concave back edge
- Convex back edge
- Tail edge adjustment with concave edge
- Tail edge adjustment with convex edge
- Small bumps that need to be sharpened
The check can be carried out with a standard pattern (which can be flat or concave).
The band saw must be completely level when placed on the table or workbench. Check it with a planer in all directions for bumps and ridges on the saw surface.
Mark all the ridges and use a special hammer to flatten the saw. For thin saws use a lighter hammer, and for thick saws a heavier one.
Grease the ridge of the saw and hammer carefully, starting in the center of the raised area. Use the flattener for checks during the procedure. Be sure to level all ridges to prevent breakage in the future.
8.MAINTENANCE
8.1.Preventive maintenance
Maintenance of the ELITE model LM PRO roller tensioner is very simple but at the same time important. The machine is fully operational after some prior preparations.
This is delivered without oil so the oil tank needs to be filled with approximately 5 liters of oil.
For long-lasting cleanliness, oil and check the machine regularly.
- Grease the two grease nipples on the front.
- Grease the upper roller with oil by lifting it with a bar.
Change the oil (SAE-90) every 6 months.
Keeping the machine clean and in good condition will allow for optimal long-term use.
Use the equipment only in dry environments. The temperature must be between 5 and 40ºC. A relative humidity greater than 90%, as well as a saline environment, would cause premature corrosion of the machine.
9. ACCESSORIES AND CONSUMABLES
10. WARRANTY
All our machines are tested before being shipped. However, there may always be defects that are not observable at first glance.
Our machines are guaranteed against manufacturing or material defects under normal conditions of use and maintenance. The period of this guarantee is 12 months from the date of purchase and consists of the replacement of defective material.
The warranty will be automatically voided in the event of modification beyond our company's control or in clear cases of misuse of the machine.
The warranty does not include parts subject to normal wear and tear due to use such as skates, lubrication cartridge, abrasives, etc.
11. DOWNLOAD MANUAL
12. FAQ
Question nr1
Answer no. 1