1.FIRST STEPS
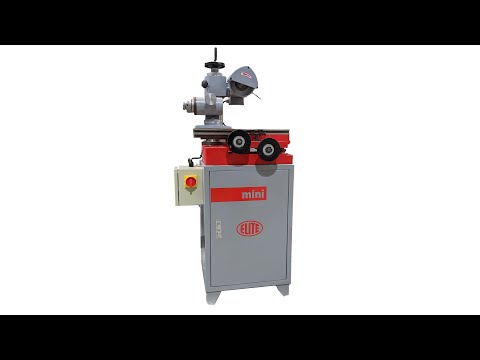
Congratulations on your purchase of the ELITE mini universal tool sharpening machine
Read this guide before you start.
The ELITE mini is the simple and effective universal tool sharpening machine. It allows a multitude of different grinding tasks depending on the accessories used with the machine.
You can view the product catalog at the following link: ELITE mini
This manual introduces you to the main functions of the grinder in order to avoid risks to your health or that may cause a breakdown or premature wear of the machine.
In case of any doubt, please contact us or one of our authorized distributors.
Informative Note: The use described in the manual of this grinding machine described therein may present some variations in use as our machinery is subject to possible construction modifications, depending on the incorporation of technological advances in our sharpening equipment.
2.SAFETY
2.1.Safety regulations
Carefully observe and apply the following safety rules, not respecting these rules may cause personal injury or damage to the machine itself.
The installation and maintenance of the machine described in this manual must be carried out only by operators who are familiar with its operation and have sufficient technical knowledge.
The ELITE sharpening machines of the ELITE mini model range have been designed for the universal sharpening of tools, excluding any other type of operation.
DANGER HIGH VOLTAGE

DANGER OF ACCIDENT

DANGER DUE TO SPARK PROJECTION

WEAR PROTECTIVE SHOES

DANGER FROM SHARP TOOLS

USE HEARING PROTECTORS
These warnings do not include all possible risks that improper use of the machine could cause. For this reason, the operator must proceed with prudence and observing the rules.
2.2.Use and storage of the instruction manual
This instruction manual must be read and understood by all personnel who come into contact with the machine.
This manual is for:
- Indicate the correct use of the machine according to the type of work to be carried out.
- Provide the necessary instructions for the transport, adjustment and maintenance of the machine.
- Facilitate the ordering of spare parts and information of risks.
Limits of use of the manual:
The machine is intended for professional use and therefore the experience of the operator is required and of vital importance.
Importance and conservation of the manual:
This manual must be considered part of the machine and must therefore be attached to it until the end of its use.
Additional information and clarifications:
The user, owner or maintenance person can contact the manufacturer to request any additional information on the use of the machine and possible modalities for maintenance and repair intervention.
Expiration of responsibility:
The manufacturer is considered exempt from any liability in the event of:
- Improper use of the machine
- Use of the machine by untrained persons
- Serious failures in scheduled maintenance
- Unauthorized interventions or modifications
- Use of non-original spare parts.
2.3.Declaration of conformity
The company hereby:
Elite Machines, SLU
Joan Oró, 27
ES-08635 Sant Esteve Sesrovires
Declares that the product indicated below, based on its conception and construction, as well as the version put on the market by our company, complies with the mandatory basic health and safety requirements of the CE directive.
This declaration loses its validity in the event of unauthorized modifications to the product.
Product name: ELITE mini
Product type: Universal tool sharpening machine
Serial No.: __
EC Directive Competences:
- EC Machinery Directive (2006/42/EC)
- European directive on electromagnetic compatibility (2014/30/EU)
- The protection purposes of the CE low voltage directive (2006/95/CE) were fulfilled according to annex I, nr. 1.5.1 of the machinery directive 2006/42/EC
The technical documentation was compiled by legal representative of the documentation:
Sergi Valls Gramunt
Joan Oró, 27
ES-08635 Sant Esteve Sesrovires
Date / manufacturer - Signature: __
Signatory data: Sergi Valls Gramunt, manager
3.TECHNICAL DATA
In the following information table, find the list of technical specifications of the sharpening machine described in this manual.
| TECHNICAL DATA | ELITE mini |
|---|---|
| Grinding wheel motor power | 0.33 CV |
| Grinding wheel rotating speed | 2900 RPM |
| Grinding wheel diameter | Up to ø125 mm. |
| Working table dimensions | 470 x 133 mm |
| Longitudinal worktable travel | 320 mm. |
| Transversal worktable travel | 140 mm. |
| Vertical travel | 190 mm. |
| Vertical rotation grinding wheel spindle | From +40º to -40º |
| Spindle horizontal rotation | 180º |
| Horizontal rotation grinding wheel spindle | From +50º to -50º |
4.TRANSPORT
The ELITE mini is delivered packed in a wooden crate.
During all transport and transfer, the machine must be kept in its original vertical position, any variation in this position may lead to the loss of the guarantee.
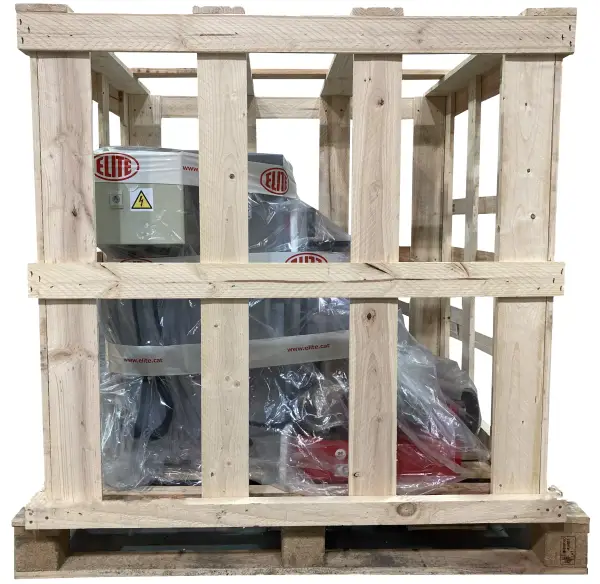
| Model | Packing Size | Weight |
| ELITE mini | 1050 x 850 x 1100 mm. | 265 Kg. |
4.1.Instructions for unpacking and setting up
Take special care when lifting the load: The load may not be centered!
To lift or move the load, use a forklift with blades long enough to support the machine, taking into account the width and depth of the machine for the calculation of the weights to be lifted.
Once the packaging has been opened, remove the fixing stops from the feet of the machine
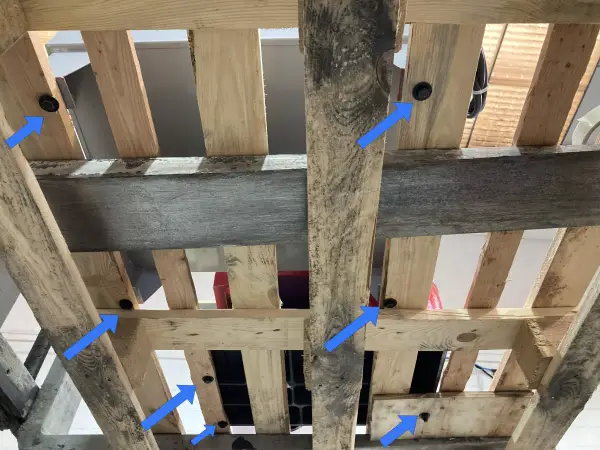
Lift the machine with safety straps or suitable equipment for a minimum weight of 300kg and place it on top of its pedestal.
IMPORTANT: Be careful with the power cord of the machine
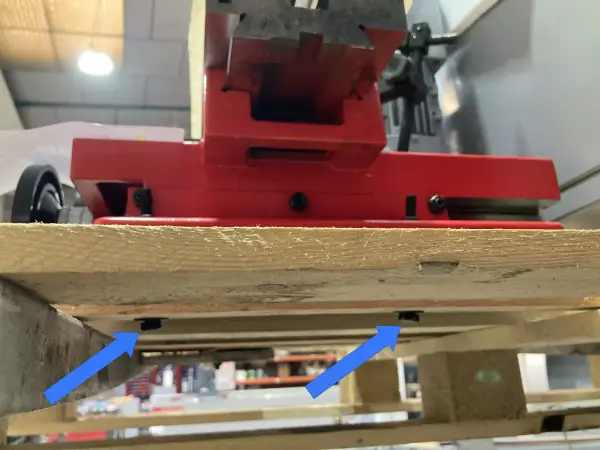
Secure the machine to the base using the three supplied screws in the holes indicated here.
Once the machine is in its final location, you can also remove the protective film and other protections from the components, which secure and prevent the machine from moving.
5.INSTALLATION
5.1.Machine placement
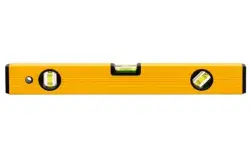
Before any work make sure that the machine is well aligned and does not oscillate at any of its ends, in which case it must be wedged to avoid movements. For its correct level it is necessary to use a leveling tool. This check must be carried out both longitudinally and transversally.
Poorly leveling the machine can cause unwanted vibrations and premature wear of the linear guides.
WARNING: The machine must not be used under any circumstances by unqualified or unauthorized personnel.
5.2.Electrical connection
DANGER HIGH VOLTAGE!
Remember: before connecting the machine, remove any protection that the machine may have to protect the components during transport.
The electrical connection of the machine must be carried out by qualified technical personnel only at the voltage indicated in the machine order / machine identification plate.
For any doubt about the voltage, consult the manufacturer before the connection.
Any claim for an incorrect connection will be out of warranty.
Extension cable
Make sure that the extension cable is in good condition and suitable for power transmission. An inferior cable reduces the transfer of energy and heats up considerably. The following table shows the correct size based on current and length.
| Amps | Extension cable | Extension cable | Extension cable | Extension cable | Extension cable | Extension cable |
|---|---|---|---|---|---|---|
| 8m | 16m | 24m | 33m | 50m | 66m | |
| <5A | 16 | 16 | 16 | 14 | 12 | 12 |
| 5 to 8A | 16 | 16 | 14 | 12 | 10 | n.r |
| 8 to 12 A | 14 | 14 | 12 | 10 | n.r | n.r |
| 12 to 15 A | 12 | 12 | 10 | 10 | n.r | n.r |
| 15 to 20 A | 10 | 10 | 10 | n.r | n.r | n.r |
| 20 to 30A | 10 | n.r | n.r. | n.r | n.r | n.r |
n.r = Not recommended
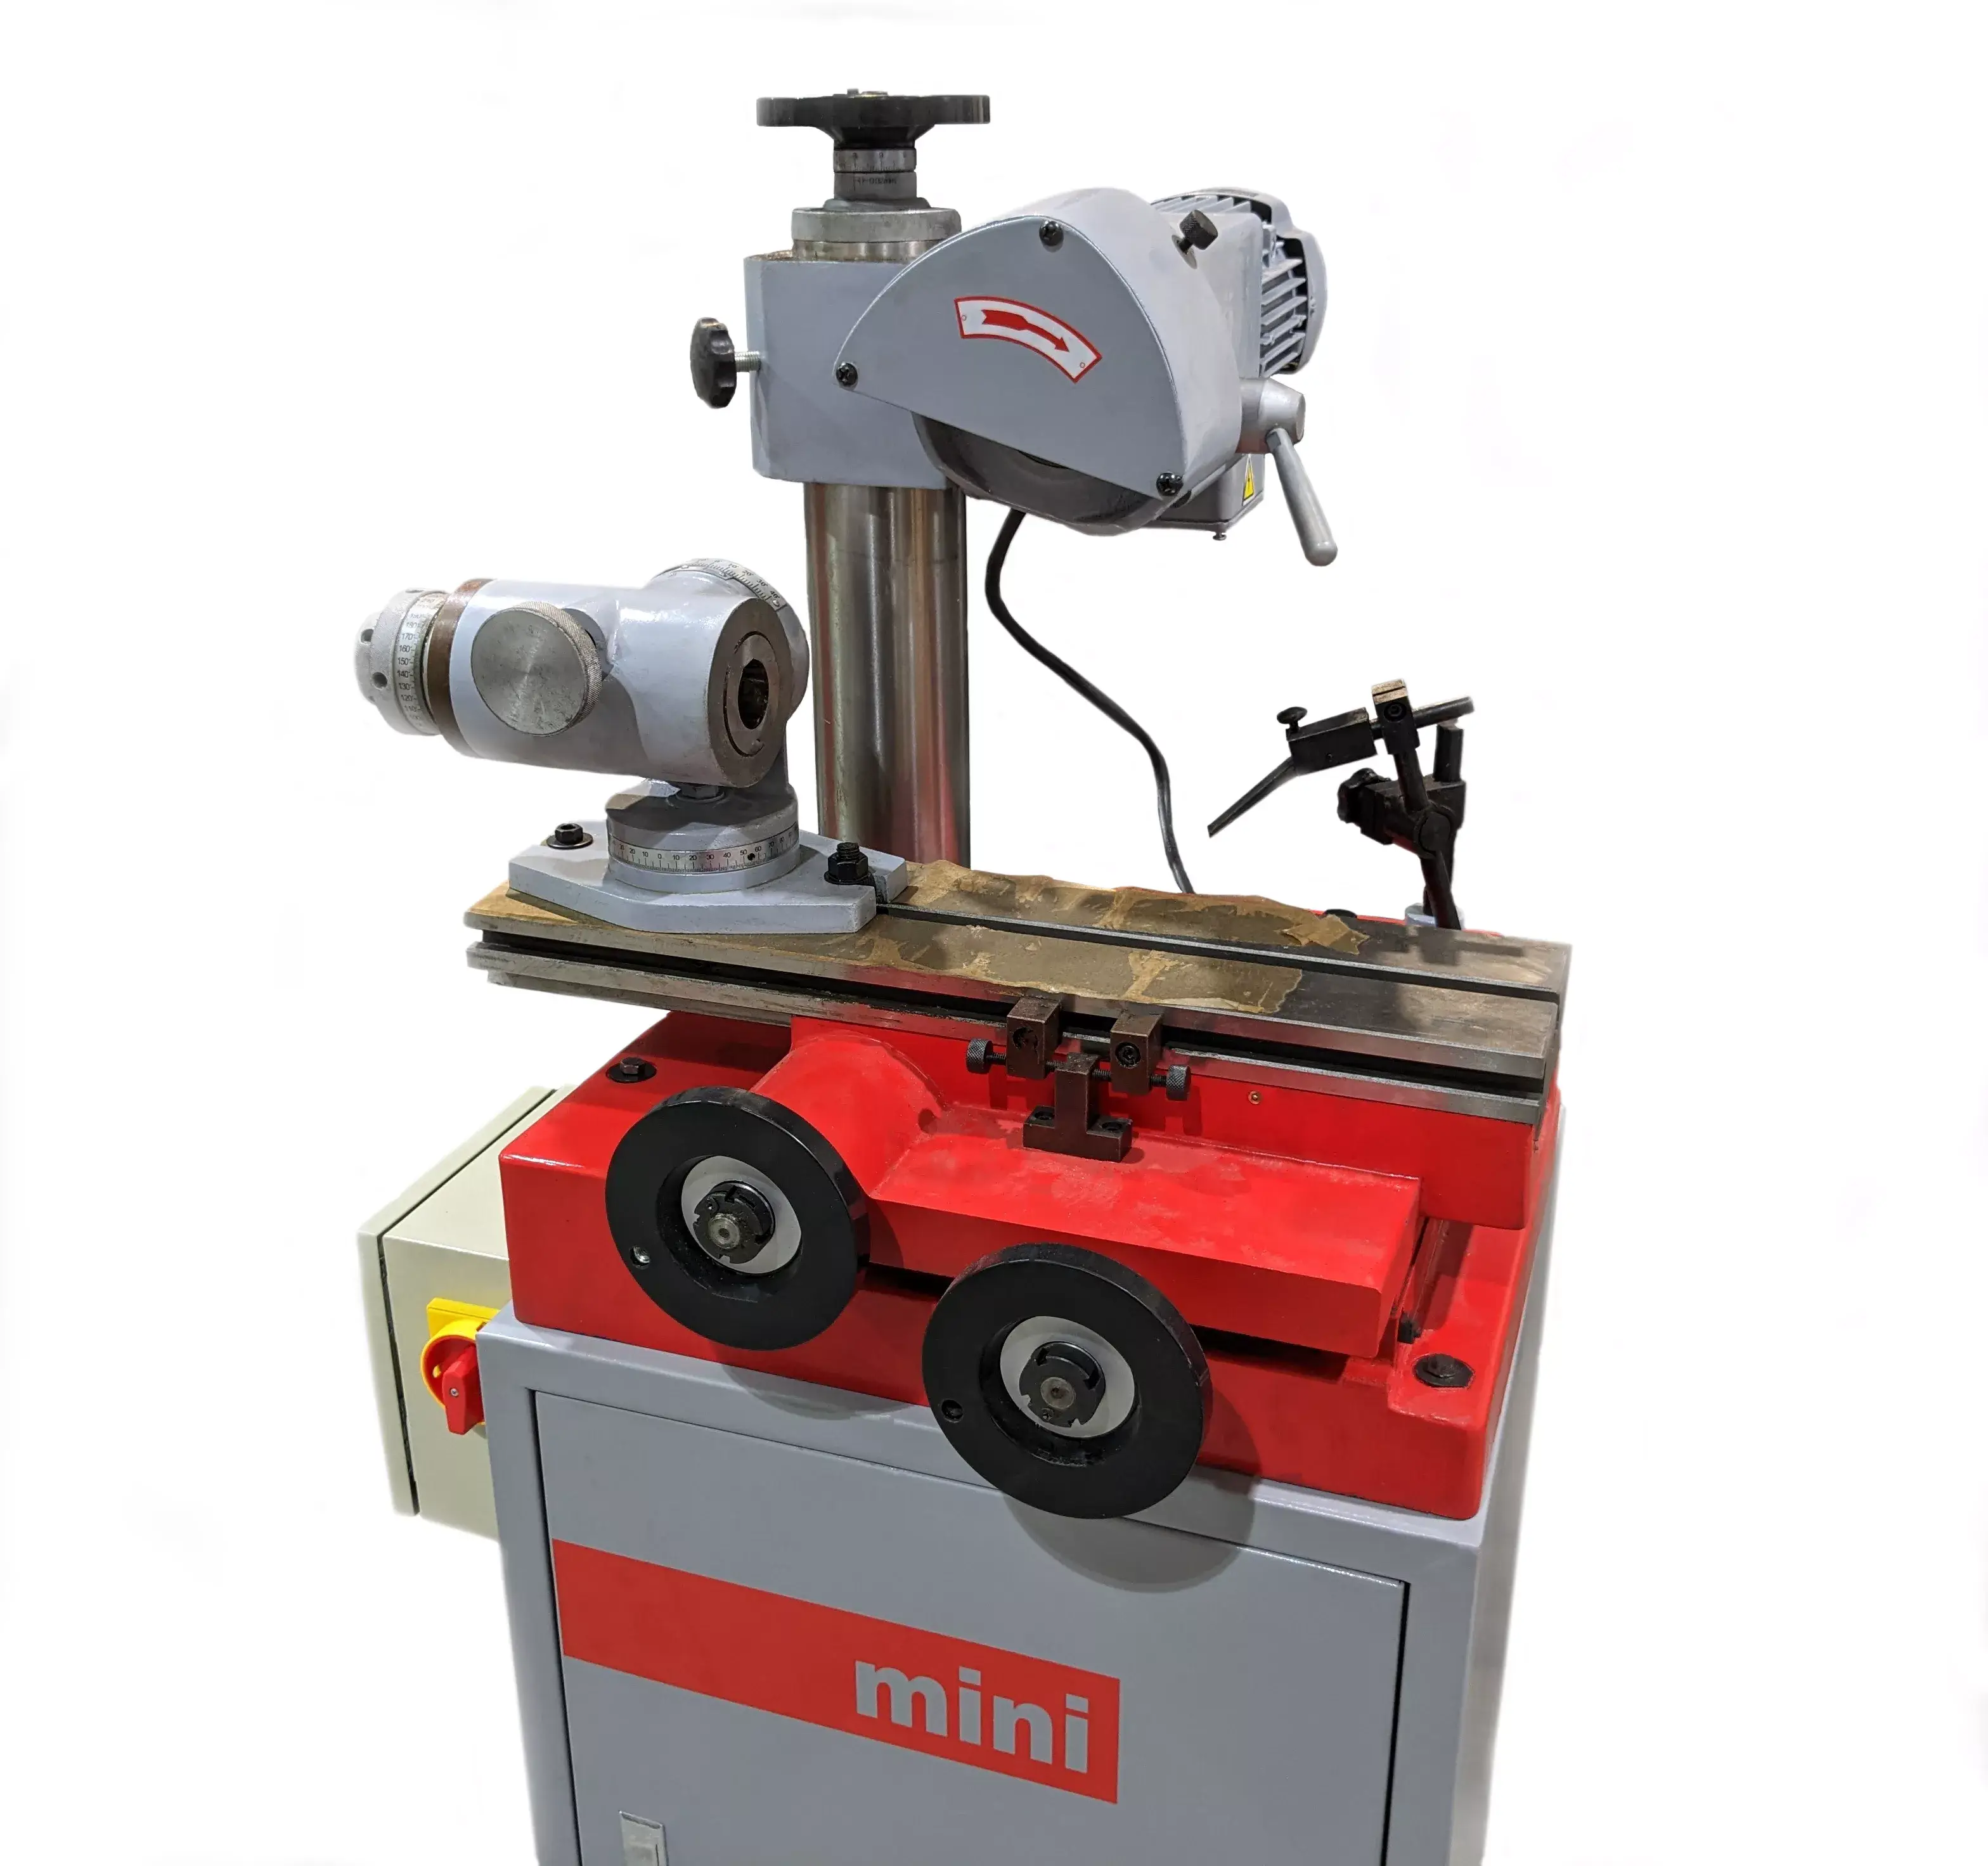
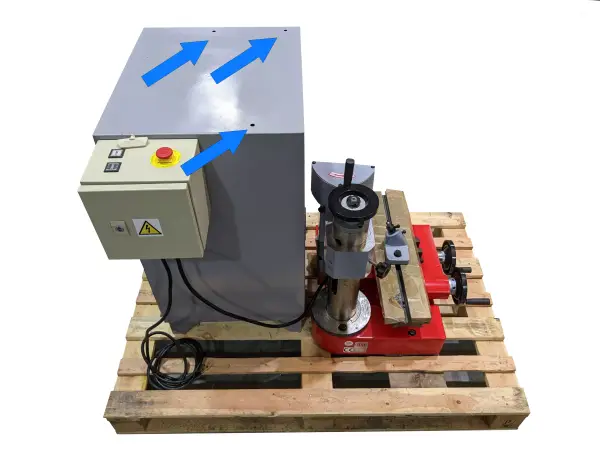
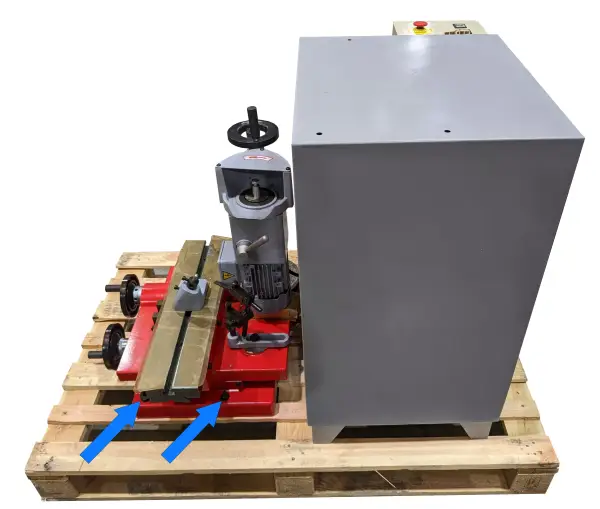
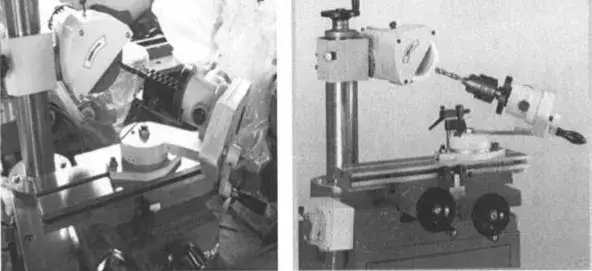
5.3.Main components of the machine
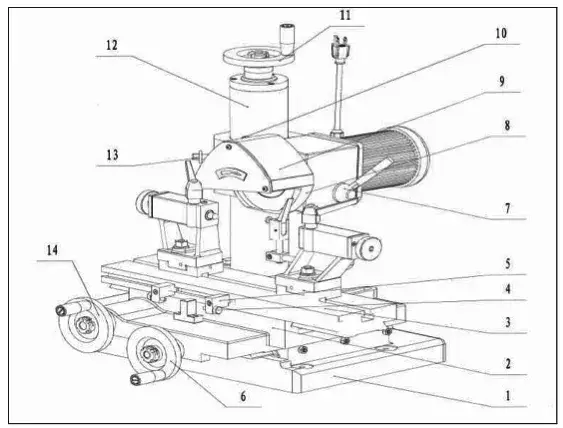
- Bench
- Sliding table
- Work table
- Adjustment knob
- Positioning lock
- Steering wheel
- Adjustment lever
- Sanding disc holder
- Protection cover
- Set screw
- Steering wheel
- Column
- Adjustment lever
- Ruffle
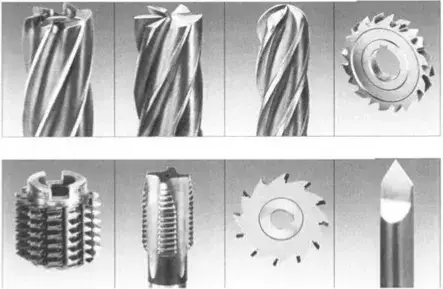
5.4. Machine functions
- Sharpening of cylindrical burs
- Sharpening of single angle burs
- Sharpening of T-slot cutters
- Sharpening of three-cut burs
- Sharpening of front milling cutters
- Sharpening of saw blades
- Sharpening of carving tools
- Sharpening of taps
- Sharpening of twist drills
- Sharpening of lathe tools
- Sharpening of reamers
- Sharpening hobs for gears
- Cutter pinion sharpening
- Flat sharpening
5.5. Sharpening of cutting tools
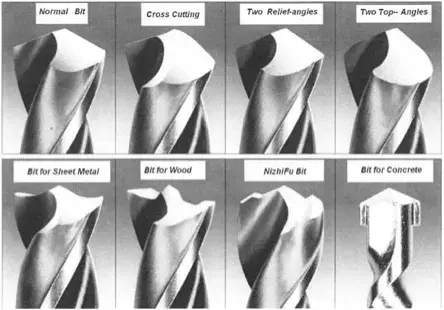
5.6 Drill Shapes
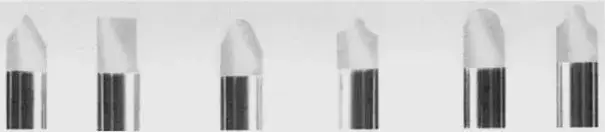
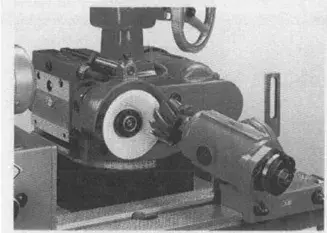
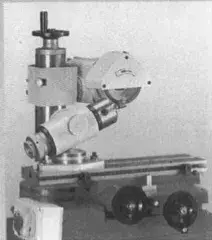
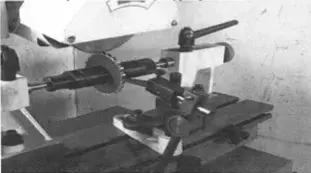
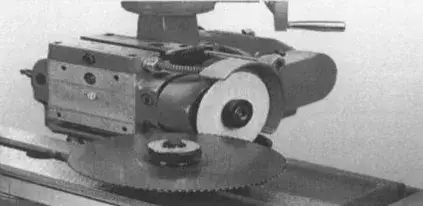
5.7 Application Examples
6.STARTING UP
In this section we show you how to operate the ELITE mini to get it working.
*NOTE: The data that appears in the different images are by way of example, each type of tool has its recommended data and an expert operator should know them.
Emergency stop
It's the round red button. In the event that there is a failure in use or a dangerous situation is being created, it allows the immediate disconnection of the machine.
Should not be used unless strictly necessary.
Once used, to use the machine again, you need to pull it back to the starting position, additional reference and configuration is needed.
WARNING: Under no circumstances should this control be modified or tampered with, as this automatically places the operator and bystanders at risk of serious injury.
Sharpening operation
To start the sharpening process, you must first make sure that the emergency stop button is not activated.
DANGER: Never manipulate the buttons on the control panel while changing the abrasive wheel: danger of very serious injury. It is strongly recommended to switch off and disconnect the machine from the mains when working inside it.
WARNING: before start to rotate the grinding wheel make sure that it is well attached to the wheel holder where it is located and that NOBODY is manipulating in the area where it rotates. UNDER NO CIRCUMSTANCES SHOULD THE WHEEL BE STARTED WHILE SOMEONE IS HANDLING IT.
6.1.Sharpening of cylindrical cutters (rear angle)
The double shank apex template is fixed in the machine. The support of the cutting tool is located at the top of the jaw. The jaw stop is fixed on the sliding table. The stop end of the jaw will be 3-5mm lower than the center line of the shank. The right hand turns the shank tooth by tooth, and the left hand moves the worktable longitudinally and sharpens the cutting tool.
Pay attention that the cutting tool does not come out of the jaw when the worktable moves to the sides.
6.2. Sharpening of single angle burs
The stem template is fixed in the machine. The grinding wheel is tilted down 3º-5º. The tool holder moves 90º-92º to the left and is fixed. The jaw stop is raised to the front of the cutting tool. The right hand indicates the cutting tool, the left hand moves the worktable lengthwise and sharpens the cutter.
6.3. Sharpening of T-slot cutters
We will use the fixture for straight shank burs. You will also need the drill sleeve for tapered shank reamers. The drill sleeve can be put directly into the spindle hole of the tool holder. The grinding wheel is tilted down 3º-10º and is held by the angle of the backrest. The jaw stop is raised to the side of the end mill. The right hand indicates the cutting tool, the left hand moves the worktable lengthwise and sharpens the cutter.
6.4. Sharpening of three-cut burs
Right Side Tapered
The stem template is fixed in the machine. The jaw stop is raised to the front of the cutter. The right hand moves the cutting tool, the left hand moves the worktable crosswise and sharpens the cutter.
Side sharpening
To sharpen the top of the cutter, the indexing finger is used to index the cutter. The tool holder axis tilts up 6º-8º and moves 83º-88º from left to right and clamps down. The right hand indicates the cutting tool, the left hand moves the worktable crosswise and sharpens the cutter.
If the user wants to sharpen more than one three-cut bur at the same time, they can be attached to the shank attachment and use the double shank apex jig for sharpening.
6.5. Sharpening of end mills
Sharpened on the outside
Loosen the bolt and turn the column (12) to the right, with an angle of 30º and then fix it. Place the cutter in the collets of the tool holder. Fix the clamp on the work table. Place the bur holder in the jaw stop. Move the worktable from left to right, while rotating the spindle of the tool holder and sharpen. When sharpening the back angle, the arbor of the grinding wheel and the arbor of the tool holder adjust up and down for final sharpening.

Cutter sharpening
Rotate the head support to the angle of 85º-90º, rotate the column to the left at an angle of 60º and fix them separately. Keep the center of the grinding wheel 5-10mm lower than the center of the blade, and also keep the blade horizontal. The scale index on the tail points on the blade. The nut at the rear is tightened. The work table is moved from right to left and sharpened.
6.6. Sharpening of saw blades
The Stem Template or the Double Apex Stem Template will be used. The jaw stop is in front of the disc. The axis of the grinding wheel is tilted up 5º-10º to decide the back angle. The teeth of the disc need to be sharpened one by one.
6.7. Burin sharpening
The cutting tool is placed on the shank of the tool holder.
The tool holder is rotated to the right through an angle of 60º. The positioning lock is fixed in a suitable position. The motor for the grinding head and the tool holder will start separately, so the sanding wheel and the workpiece rotate in opposite directions. Use the flywheel (6) for power. Move the work table and sharpen.

6.8. Tap sharpening
The apex template and concave type wheel will be used. The cutting tool is fixed at the top of the jaw. The right hand moves the tooth of the tool. The left hand moves the worktable and sharpens.
6.9. Drill bit sharpening
The drill template and flat wheel will be used. The tool holder is rotated to the left at an angle of 55º-60º and clamped. Put the bit in the holder. Let the tooth plate point to the lip of the bit. Attach the lip to the bit and remove the tooth indexing plate. Turn the wheel and sharpen. The diameter range of the bit to be sharpened is from 5 to 32 mm.
6.10. Lathe tool sharpening
Dividing head and tool holder for lathes will be used. The dividing head is used to adjust the angle of the blade. Set the blade after adjusting. Move the work table and sharpen.
6.11. Reamer sharpening
The double shank jig and concave type grinding wheel will be used. The jaw stop is raised to the inside of the blade. The right hand separates the tooth. The left hand moves the worktable crosswise and sharpens.
6.12. Gear hob sharpening
The stem and double stem template will be used. The jaw stop is raised in front of the blade. Use both hands to sharpen.
6.13. Cutter Sprocket Sharpening
The powerhead and stem template will be used. Rotate the column to the right at an angle of 30º. Rotate the tool holder to the left at an angle of 75º-80º and fix it. Press the button to activate the rotation of the motorized head and the grinding wheel. Move the worktable crosswise and sharpen.
6.14 Flat edge
Electromagnetic chuck should be fixed on the worktable to do flat grinding.
7.WORK OPERATION
8.MAINTENANCE
8.1.Preventive maintenance
The maintenance of the ELITE mini model grinders is very simple but at the same time important.
ATTENTION: Do not clean or maintain the machine while it is connected to the power source, it may damage the machine and the person. Turn off the machine and disconnect it from the power supply before carrying out any maintenance or cleaning work
The machine is low-maintenance and contains only a few parts, which need to undergo maintenance.
Any breakdown or defect that may affect the safety of the machine must be eliminated immediately.
Thorough cleaning ensures a long life for the machine and is a safety requirement. The use of solvents, harsh chemicals, or abrasive cleaners can damage the machine casing. For cleaning use only mild detergents.
Apply a light coat of rust preventative (eg WD40) on the unpainted surfaces of the machine.
After each work shift, the machine and all its parts are thoroughly cleaned of dust and chips with a vacuum cleaner. Do not use compressed air for cleaning, as it embeds the particles inside the guides and bearings.
Regularly check that all warnings and safety instructions are available on the machine and perfectly legible.
Before each use, check the status of the safety devices.
The machine cannot be stored in a humid place and must be protected from weather conditions.
Repair work may only be carried out by qualified personnel.
Use the equipment only in dry environments. The temperature must be between 5 and 40ºC. A relative humidity greater than 90%, as well as a saline environment, would cause premature corrosion of the machine.
Lack of maintenance will void the warranty and warranty claims.
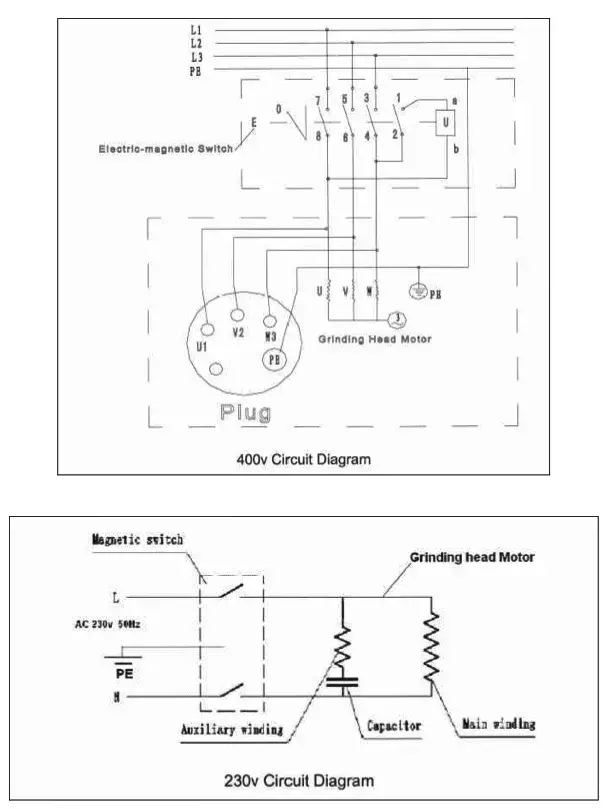
8.1.Electrical diagram
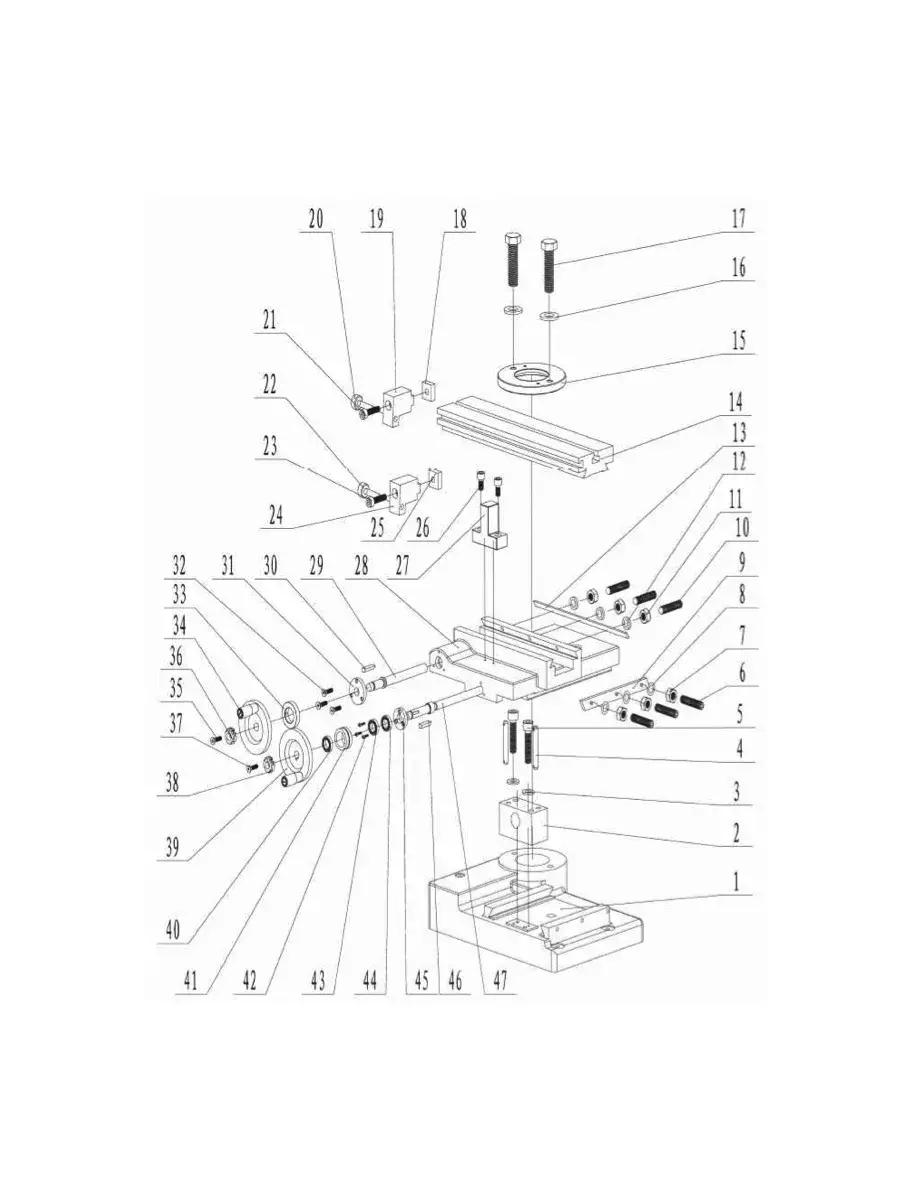
8.2.Exploded view
Machine body parts
| No. | Description | Quantity |
|---|---|---|
| B-1 | Basis | 1 |
| B-2 | Turkish spindle | 1 |
| B-3 | Washer | 2 |
| B-3 | Pin | 2 |
| B-5 | Screw | 2 |
| B-6 | Screw | 3 |
| B-7 | Hexagon nut | 3 |
| B-8 | Washer | 3 |
| B-9 | Guide support | 1 |
| B-10 | Screw | 3 |
| B-11 | Hexagon nut | 3 |
| B-12 | Washer | 3 |
| B-13 | Guide support | 1 |
| B-14 | Work table | 1 |
| B-15 | Column base | 1 |
| B-16 | Washer | 2 |
| B-17 | Screw | 2 |
| B-18 | T-Nut | 1 |
| B-19 | End of race | 1 |
| B-20 | Adjustment screw | 1 |
| B-21 | Locking screw | 1 |
| B-22 | Adjustment screw | 1 |
| B-23 | Locking screw | 1 |
| B-24 | End of race | 1 |
| B-25 | Nut | 1 |
| B-26 | Screw | 2 |
| B-27 | Lock Stop | 1 |
| B-28 | Guide | 1 |
| B-29 | spindle | 1 |
| B-30 | Pin | 1 |
| B-31 | Spindle disc | 1 |
| B-32 | Screw | 3 |
| B-33 | Friction washer | 1 |
| B-34 | knob | 1 |
| B-35 | Screw | 1 |
| B-36 | Washer | 1 |
| B-37 | Screw | 1 |
| B-38 | Washer | 1 |
| B-39 | Steering wheel | 1 |
| B-40 | Washer | 1 |
| B-41 | Friction washer | 1 |
| B-42 | Screw | 2 |
| B-43 | Bearing | 1 |
| B-44 | Bearing | 1 |
| B-45 | Spindle disc | 1 |
| B-46 | Pin | 1 |
| B-47 | Spindle | 1 |
Machine column
| No. | Description | Quantity |
|---|---|---|
| C-1 | Pillar | 1 |
| C-2 | Nut | 1 |
| C-3 | Locking cam | 1 |
| C-3 | Locking cam | 1 |
| C-5 | Body | 1 |
| C-6 | Screw | 2 |
| C-7 | Screw | 1 |
| C-8 | Lock nut | 1 |
| C-9 | Steering wheel | 1 |
| C-10 | Screw | 1 |
| C-11 | Vernier | 1 |
| C-12 | Pin | 1 |
| C-13 | Bearing | 1 |
| C-14 | Screw | 3 |
| C-15 | Graduated cover | 1 |
| C-16 | Bearing | 1 |
| C-17 | Spindle | 1 |
| C-18 | Screw | 3 |
| C-19 | Nut | 1 |

8.3. Spare parts order
For ELITE machines always use original spare parts to repair the machine.
The optimal fit of the parts reduces the installation time, increases the safety of use and preserves the life of the machine.
For any questions contact us or go to your distributor.
9.WARRANTY
All our machines are tested before being shipped. However, there can always be defects that are not observable at first sight.
Our machines are guaranteed against manufacturing or material defects under normal use and maintenance conditions.
The period of this guarantee is 12 months from the date of purchase and consists of the replacement of defective material.
The guarantee will be automatically canceled in the event of a modification outside our company. Or in manifest cases of misuse of the machine.
The guarantee does not include parts subject to normal wear due to use such as skids, lubrication cartridge, abrasives, etc.
10.DOWNLOAD MANUAL
ES - User Manual ELITE mini.pdf